Dog Feeder project

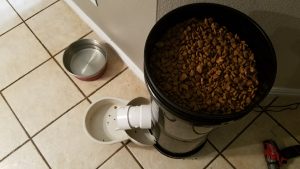
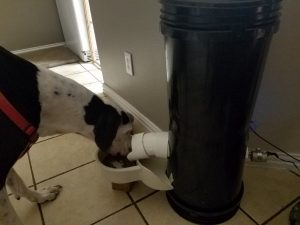
It’s been a while since I have been able to play around with a project, but I needed a way to feed the dog without being there to do it for a couple of days and the auto feeders were all for small dogs which wouldn’t do for the tiny great dane we have.  So, here’s the list of materials:

  1. 3″ PVC DWV Hub x Hub x Hub Sanitary Tee
  2. 3″ PVC PIPE (less than a foot just to connect fittings)
  3. 3″ 45° PVC Elbow Socket
  4. 3″ PVC drain cover (shower drain cover)
  5. 3″ to 2″ Reducer Bushing Spigot x Socket
  6. 2″ Plug (couldn’t find a link online)
  7. DC 12V 0.07A 3.5RPM High Torque Gear Box Electric Motor 37mm
  8. 2 Five gallon buckets
  9. Auger drill bit for drilling holes in the ground for planting bulbs
  10. a bowl of to receive the food
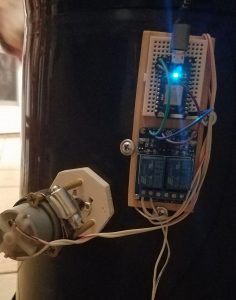
  11. Particle photon
  12. 2 relay board (you could use a single relay for this project )
  13. 12v power supply for the motor
  14. 5v power supply for the photon

(After all was said and done I figure the cost to be around $60.)

I used a hole saw to cut an insert from wood that would fit into the 2″ plug to help give the auger some stability in the pipe.  So the space inside the plug is full of wood now.  Next I drilled a hole of 11/32 in center of the plug to pass the auger through.  The auger then needed to be attached to the motor.  You can figure this part out for yourself as I am not sure I did it the best way (I drilled a hole into the auger that fit the motor axle, then I used a torch and soldered the motor axle inside the auger shaft).  When this was done, I put the 2″ plug into the 3″-2″ busing and that into the pipe.

I cut a hole in the bottom of one of the buckets (top bucket for the food) the same size as the inside of a 3″ socket and cut the grates out of the drain cover.  Then inserted the drain cover through the bucket and into the sanitary tee fitting essentially attaching the bucket to the pipes.  I then cut a hole into the bottom bucket large enough to fit the sanitary T a small hole on one side to slip the motor though and on the other a larger 3″ hole to fit the other end of the T where the food is dispensed.  I think slipped the T down into the bottom bucket and the motor through the small hole I cut in the side of the bucket for it.  The 45° elbow was then added via some pipe to the T through the other side of the bucket and I added a  3″ coupler with part of the top cut off to add some overhang for the dispenser.

The code for this was really simple, we feed her twice a day, so the main loop of the program looks like this:

void loop()
{
//PUT YOUR LOOP CODE HERE
relay1Pulse(“pulse”);
delay(54000000);
relay1Pulse(“pulse”);
delay(32400000);
}

The relay1Pulse is from my other projects and is as follows:

int relay1Pulse(String command){
digitalWrite(relay1,LOW);
delay(48000);
digitalWrite(relay1,HIGH);
return 1;
}

The pulse time of 48 seconds is the perfect amount of time to give 2.5 cups of food per pulse.

So, really this was more of a hardware challenge than a coding one, but hey, it was fun.  Hope you enjoy and please add any ideas you have to the comments below.

Here is a short video of it working:
 

Finding bugs

Have you ever looked at something from so many angles you think you’re going to go crazy?  The email functionality of the sprinkler program was not working and after the umpteenth idea of what it might be, I finally came across something that triggered the answer.  I knew I was failing to send due to a 401 error which is an authorization problem, but couldn’t understand why it worked from my browser and not from the photon.  Well, it turns out I had put the script in a folder that I had password protected (where the garage door web pages reside), and in chrome once you log in with one tab, they are all logged in.  So, I was logging in implicitly while in chrome and the request and email worked.  The solution, make sure and put any scripts (php) you are using for external access from the photon in an open area of your web host, so that the photon can access it.  There is probably a way to get it to login, but for the most part these scripts will be hidden on the photon and not used by anything exposed too much.

Hope this helps you avoid the problem.

Have fun coding.

Back to the irrigation system!

Well it is getting close to time that I am going to have to water the yard more than once a month, so I finally decided to get back to work on the irrigation system.  I had run into a problem with the pronto related to the number of particle.functions I was using.  I guess there is a limit based on the ram use on the board.  Well, I thought I was well within the limit, but I guess not.  After going back and forth with technical support, they suggested that I reduce the number of particle.functions calls and use the string passed in to differentiate the call for the different zones, programs, etc.  I have done it and it seems that it is working again.  I am not going to attach the whole program like I did before, as it has some sensitive information in it, but I hope to make it easy enough to follow.

Continue reading Back to the irrigation system!

Thermostat?

I don’t really want to turn this into a blog with a bunch of re-posts in it, but I ran across this and partially for my benefit to remind myself of it and in case anyone that comes across this blog might find it interesting.  Here is an interesting guild on making a wireless thermostat.  Maybe someday I will take this on.  It sounds interesting as a start.  I think you must have some sort of manual access in for it on the wall however.  I don’t want to always use the web or my phone to change the temperature.

Google drive space

I love google drive, but I am about to run out of “free” space.  Ever since google started allowing unlimited space for photos and videos under a certain size, I have been looking for a way to convert all of my old stuff to this new required size.  It is finally available in a new option in the photo’s settings page.  If you, like me, are running out of space, and you don’t care if your picture are “only” 16MP and your videos are “only” 1080p, the run the conversion and free up that space.   I hope this is useful to others and helped you out.

I hope to get out the latest version of the irrigation system soon.  I am working out bugs in the photon code and it is requiring a bit of refactoring.  Thanks for being patient.

Latest on the Irrigation system

I have finished the first draft of the project and it appears to be working.  Let’s go over the list and just hit the high points of how I did things and problems I came across.

  • Plug into the weather to determine if they need to be run.

So I was able to find an httpclient for the photon that I am using to check a weather site for the latest rainfall totals.  I save the data from the last two days and if it is over an inch I skip that day’s watering.

Continue reading Latest on the Irrigation system

Big Android BBQ

Over the past two days I attended a conference called the Big Android BBQ.  I found out that Google Developers was sponsoring the conference that has been around for 5 years now.  XDA-developers also sponsored the even which is where I found out about it initially.  So, I took a couple of days off work and went to the conference.  It was an interesting experience and I recommend it to anyone interested in developing on android.  There were several sessions a day and they went over topics from a talk on git, code labs for automated testing, performance on mobile, android for java developers, and even a fireside with John McAfee.  They had a lab where google employees were available to help as you walked through some code tutorials.  It was really pretty cool over all.

Am I now an android developer?  I would say that it was definitely a learning experience and it would be helpful if I could ever think of a useful app to write.

If you see a conference coming to town, do yourself a favor and go learn something.

Irrigation System Proof of Concept

I have worked on the irrigation system over the past weekend and have hooked it up for its first test run.  Here is the latest view of the hardware.

IMG_20151018_213212

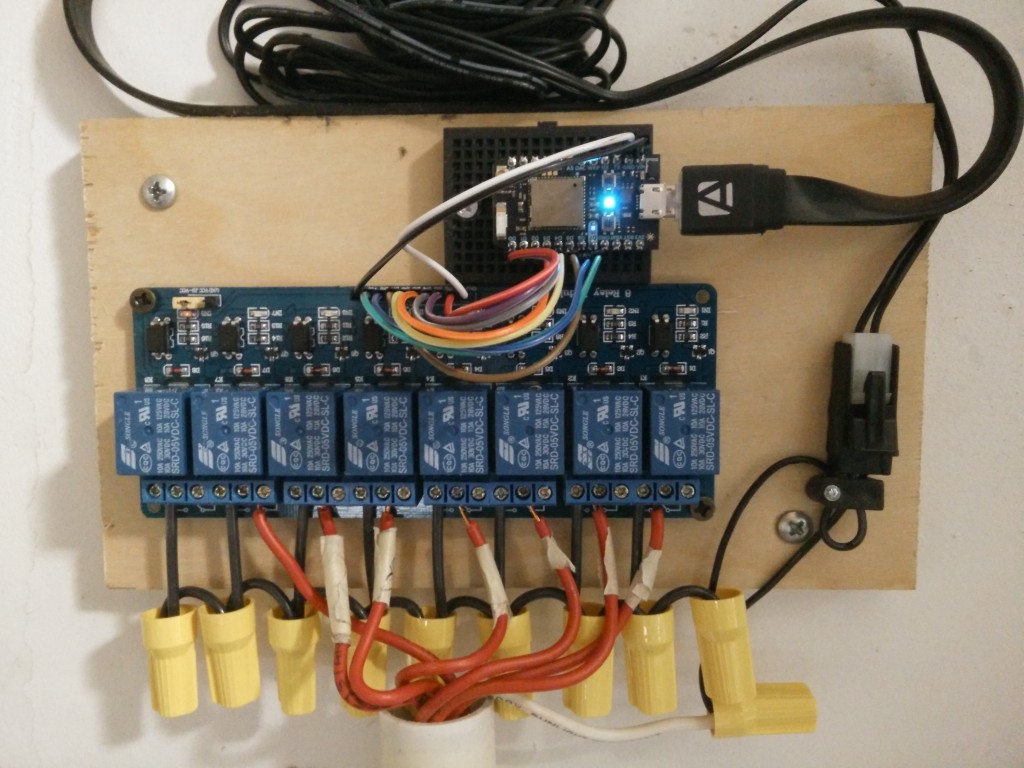
I’m not sure if you can tell everything that is hooked up and where, but here is the run down.  The relays are number 1-8 from right to left.  The red wires are the valves (solenoids) where the wire in relay 7 is the main valve which needs to be turned on when each of the solenoids is turned on.  The wires for the power is hooked up to the open side of the solenoid.

Continue reading Irrigation System Proof of Concept

Pebble Control for the Garage

Okay, I know I said that I was going to start on the irrigation system, but I found something cool that I needed to add to the garage door project.  It involves the use of a pebble smart watch to open/close and check the status of the doors.  I have modified the code that I found here so that it works with two doors and work with my other code.  If you have a pebble and are running the project, this is a cool addition.  The code with all the changes is here.

Capture

If you have any changes that you think could improve it, please comment below.  Also, one thing I notice is that when using the watch app it seems to get messed up if you hit the buttons to quickly.

Enjoy!

Irrigation system

IMG_20151012_185017
(That is my anti-static mat that it is sitting on :))

There are plenty of irrigation systems that are connected to the internet, but I enjoy playing around with this stuff so I’m making my own.  I have just started the project, but here is what I have so far.  There was just one on woot today for $164 that looked very polished and intriguing.  There is also one for the Pi that comes with a pre-built open source program that has many of the features I want.  That said, I think I can do it cheaper and get what I want.  I also have plans to add a rain gauge to it to make it work even better, but that’s for another post after I get this project done.

Continue reading Irrigation system